My most valued possession is my family. Even if you are living in a box
somewhere, and you have the love and support of your family, you will always be
wealthy. Love really is all you need. From love, great things will emerge. From
your thoughts, you can create greatness.This is what I need to remind
myself of everyday to be the best person that I can be. Live your life with
gratitude. Be thankful for all that you have everyday, even if it is your eyes
to see or your ears to hear or your feet to walk or your hands to create.
Understand your place in this Universe; how infinitesimally small you are, but
how huge a contribution your Spirit is. Don't wear blinders to the world around
you, you're not the only one here. Be kind, considerate, don't be judgmental,
love others, and yourself. Know that you are perfect inside; that you are
love.


Saturday, September 29, 2012

An unbelievably quick dinner...I did it while preparing a blog post!

I whipped up this quick but decadent dinner with just a few, easy ingredients. I used a frozen bag of cheese tortellini, a bag of Birdseye steam-in-the-bag peas (they were cheapest), a little olive oil, and some feta and Italian blend cheese, garlic powder, salt and pepper and the juice of half a lemon plus it's zest. 

 I boiled some water and poured my bag of pasta in and set the timer following the bag's instructions. Then, when it was almost done I added half the bag of frozen peas. At the end of the boiling time I ladled out some of the cooking water to save and poured the rest into the colander. I put the pasta and peas back into the pot, added a little olive oil, garlic powder, salt and pepper, zested the lemon into it, and a little of the leftover cooking water to keep it from becoming to 'sticky' and squeezed the half lemon into it. Do you know the trick of squeezing the lemon juice into your closed fingers first to catch the seeds? It really works, then you're not wasting time picking lemon seeds out of your dish. I tossed in a bit of feta, don't worry if some of the chunks are big, it'll melt, and the Italian blend of cheeses.

Meanwhile, I sliced some bakery-made 9-grain Italian bread and toasted it under the low broiler (watch closely), until golden brown. I spread a little butter on that while still hot, sprinkled garlic powder on it after it was melted, added a bit of the Italian blend cheese, popped it in the turned-off oven to melt and viola!

Add a quick Romain or green leaf lettuce salad with your favorite toppings and dinner is done!
Quick, easy and filling.
I'll have to show you my easy enchiladas next.


Pear scones and homemade caramel sauce, Harvest pear crisp

So, after editing the photos and narrowing it down as much as I could, here are the delicious and easy pear desserts I made.
There are quite a few photos, but I'll keep the directions brief. I'll post the links to the actual recipes at the end of each dessert.


First, the Harvest Pear Crisp. It's like apple or peach crisp, but with pears, of course! I started with the pears I picked from dad's tree...


Harvest Pear Crisp

 I washed them, and sliced them up and cut off the hard core and end pieces. You could peel them, too, but I left the skins on. After they're done, you can't really tell there's skin on them, so it saves a little time, plus you're getting all of the good fiber.
This recipe calls for about 3 pounds of sliced pears. These pears were huge, so about 4 1/2 of them yielded what I needed (The other 1/2 is used for the scones).


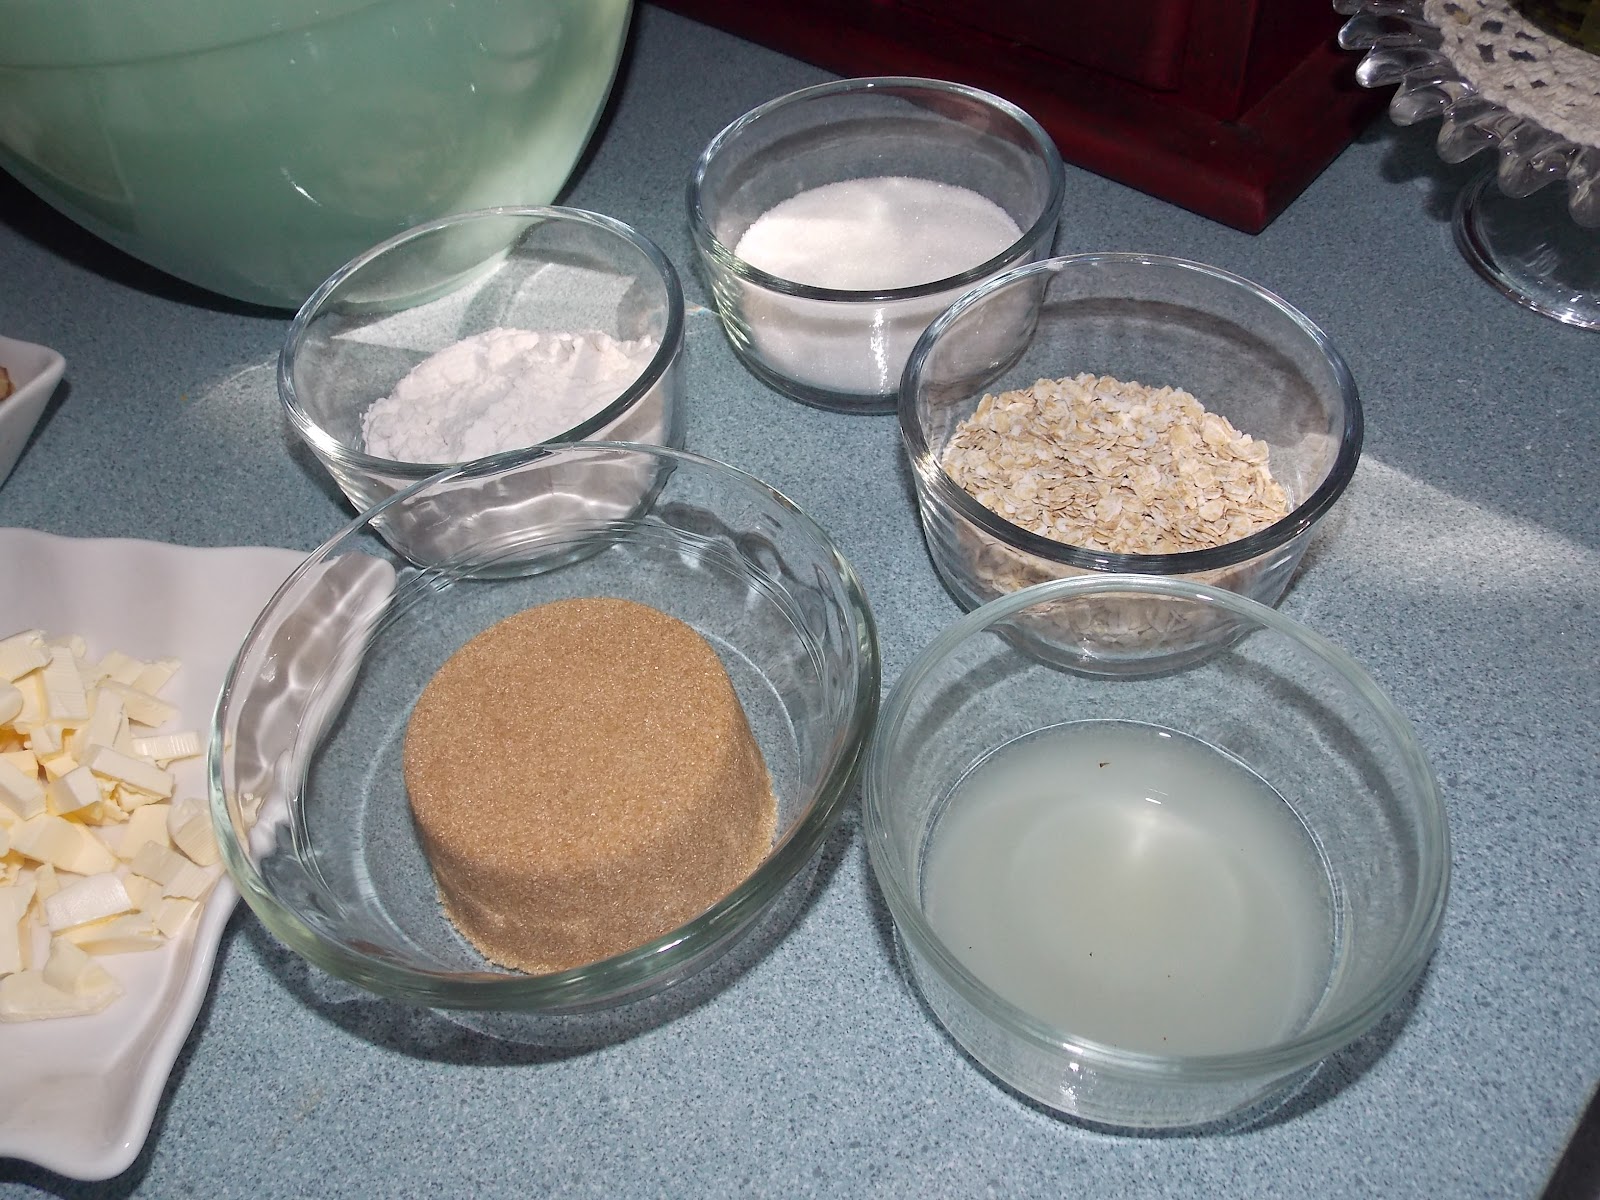
Gather all of your ingredients. You'll use 1 Tbsp cornstarch, 1 1/2 tsp ground cinnamon, 1/4 c chopped walnuts, and 1/2 tsp salt.


 You'll also need 1/2 c packed brown sugar, 1/3 c flower, 1 Tbsp fresh lemon juice, 1/3 c regular oats, 1/3 c white sugar and 3 Tbsp chilled butter, cut into small pieces.


Toss the pears in the lemon juice, then mix the 1 tsp cinnamon, granulated sugar and cornstarch with a whisk and toss well with the pears to coat.


In a food processor, combine the flour, the 1/2 tsp cinnamon, brown sugar and salt. Pulse until combined.


                                    Add the butter and pulse until it resembles a course meal.

           
                                                                    Add the oats...


                                             And walnuts...


Pulse well to blend. Place the pears in a baking dish. I used two round dishes, but you can use a two quart baking dish, too.


                                                Sprinkle the mixture evenly over the pears.


Bake in a 375* oven for about 40 minutes or until the pears are tender and the topping is golden brown. It smelled wonderful, but tasted even better. Try it with some ice cream. It was a wonderful treat!


I found this pear crisp recipe at myrecipes.com. Super easy and they provide all the nutritional information, too.


At the same time I made the crisp, I prepared my ingredients and mixed up the scones. It was that easy!

 Pear Scones


First I sifted together my 1 3/4 c flower, 1/3 c packed brown sugar, 2 tsp baking powder, 1/2 tsp cinnamon, and pinch of salt in a large bowl. I don't have a sifter, so I used my mesh strainer instead. It worked just as well. I just put everything in and used a spoon to break up the brown sugar and sift it through.


                                              This is what it looked like when I was done...


                                                Then I added my chilled 1/3 cup of butter.


 I mixed that with my (clean) hands. It was quick and not as messy as you'd think. And it incorporates the ingredients very well.


                      Next, you have to beat one egg with 1/2 cup half and half or cream...


                                                             Until well blended...


 Pour the egg/cream mixture into the dry ingredients, mix until blended, then add 1 cup chopped pears. You can peel the pears first, I left my skins on...we don't mind the fruit skins. We didn't even notice it in either recipe. Fold in your chopped pears really well. (You could add some of your leftover chopped walnuts now, too. Boy, I wish I had. I will next time, for sure!)


                                      Drop large spoonfuls onto an ungreased cookie sheet.


 Bake at 375* for about 15 minutes, until golden brown. Mine came out perfect.


  Scones can sometimes be dry and not too flavorful, the ones I've had from a mix, anyway. But these...these are perfect. This recipe is from allrecipes.com.

These are great by themselves, or you can try them with a drizzle of homemade caramel sauce.

                                         Caramel Sauce (in the MICROWAVE!)

I made mine by following this recipe from Tracy's Culinary Adventures (click to go straight to her blog, the directions are great, but I was confused on the corn syrup). I just wanted to show you that it CAN be done. And (after two mistakes by me and three batches later because I was trying to figure out the corn syrup) it was perfect.

So...You stir the 1 cup sugar, 2 Tbsp (LIGHT)corn syrup, 2 Tbsp water and 1/8 tsp lemon juice in a  2-cup microwave-safe measuring cup or glass bowl. Clear is best so you can see the syrup caramelize to the right color. I put mine in the microwave for 5 minutes. It came out just like her picture.


 Then I watched it for about 5 minutes or so, so that it had time to darken to the right color. (It got a little darker than this.)


  I added my 1/2 c hot heavy cream, slowly (notice how I picked desserts with all pretty much the same ingredients? Now I won't have to figure out what to do with an almost full little carton of heavy whipping cream--no waste! Well, not counting the 'bad' batches I made. Oh well, live and learn, right?)

                                                It bubbles up as you stir to incorporate.


                     Then I added my 1 Tbsp UNsalted butter and slowly mixed that until melted...


Then I really stirred it to get it all mixed well and thickened. I let it sit to cool, watching it every so often to be sure it wasn't "sugaring" like my first batch. See, I used the light syrup first, didn't cook it long enough. I went ahead and made the batch, but it was really light. I thought it was because I wasn't using dark syrup, and apparently the sugar hadn't boiled down enough, so, while it almost tasted like caramel, it wasn't close enough, then it "sugared" turning gritty and inedible...so I dumped it, wasting it :(   Then I made a new batch with the dark corn syrup (after calling my husband who, thankfully, was at the store already :) to grab me some dark syrup). I made a batch with the dark, cooked it too long because I didn't cook the first batch long enough and burned it. That stinks. Alot. For quite awhile. Anyway, not to be conquered by some sugar and water and corn syrup, I tried again. This time having faith in the light corn syrup. I read the directions very closely, and it turned out perfectly. Microwave for about 4-8 minutes according to how hot your microwave gets...or until you see it taking on some color. 5 minutes for me. It. was. perfect.
I let it cool and just before it got too solidified, I put it in a storage jar.
Can't wait to slice these fresh Honey crisp apples I just got!


Care for a delicious Pear Scone drizzled in warm caramel?


OMG, it really was divine. Hope you try these recipes, and you can easily substitute apples...it is apple picking season, after all!


Stay tuned for more scone recipes I'm wanting to try...I can't wait!

Enjoy!

Thursday, September 27, 2012

Summers bounty


My dad has a pear tree in the front yard of his new home. The story of dad's new home is bitter sweet. Mostly bitter, with a little miracle whipped in. When mom died, my dad couldn't stay in their house, a split level an hour away from my sister and I and all of our family, so we moved him nearer to us the day mom passed. He stayed with my aunt (mom's sister) and my cousin worked hard to find dad his own place. Within one exact week, he had found a house that had been totally renovated into a wheelchair accessable home.  Turns out, the owners are related to my dad. That's a benifit of coming back to the small town you grew up in, I guess. Anyway, dad is settling in nicely, getting his routine down. A neat added bonus to this house is the pear and cherry tree in the front yard. We missed harvesting the cherries (but the neighbor lady didn't ;), but I didn't miss the pears. So, a week or so ago, I picked some, brought them home, and left them to ripen.


Aren't they lovely? And right in the front yard! I made two wonderful desserts with them...
Check back for what I made, and how.
They were delicious!

A visitor to our front porch

We have a little friend that comes around...but I've never been able to really get a good picture of him, until now. With my new camera, I was able to zoom in from inside the house, so as not to startle him away.

Don't worry...he's a bit cuter that a slug (in some opinions!)


We see him all the time, and I've even gotten a few pics with my phone, but none this good. I'd like to try to get some of him hovering around the hanging plant we have, but I'm just not quick enough...yet.

Do you have any nature to see out your windows? Take the time to look for it...it'll do you some good!

Have a great day!

Nanette

Saturday, September 15, 2012

Did a little shopping...

Hi, All!  Hope you are well.

I have been feeling really under the weather for the last few days, but Noah and I ran out for a little while yesterday, he had a coupon for Michael's and wanted to use it ;) Maybe a little retail therapy would help. It did, a little, but I'm still fighting whatever this is that is going around.

Anyway, while we were there, I found a few cute little Halloween things...

These ceramic mini loaf pans and fluted cups were on sale for $1.00 each (plus I had a 20% off coupon for regular and sale price items, as well as a 50% off coupon for one regularly priced item. Did you know they will let you use both coupons in one transaction?). They had several fall colors, I picked the purple to display on open shelving in my cream and black and yellow kitchen for the fall and even Christmas time.


 I couldn't resist these little melamine plates...I just got 4, they were $1.99 each (again, I had a coupon), and these fun bottle labels-4 for $1.99.


I also found these wooden script words. I thought I would paint this black and hang it above a gathering of black framed black and white photos.


I like the idea of using a pallet to hang on the wall with the photos inside. I found this example on Pinterest. (via shelterness.com )

Pinned Image


Or this from brownpaper--packages.com.

            .Pinned Image

Or something like this from articlestorez.com

Pinned Image


What do you think? I just have to figure out where to put it...


So...after we left Michael's we decided to go into Ashley Furniture and take a look around. Eventually we want to replace our living room furniture, so we wanted to take note of what they had. We did find a few pieces to keep in mind, but there were a few accessory pieces I found that I really wanted to leave with. I probably paid a little too much for them, but we always buy on sale and hardly go shopping for the house, so I went for it.


This is what we bought:


This is a rustic wire wall shelf with hooks and chicken coop-like bins. Each hook and bin is numbered, convenient for the three we have in our family. I thought this was a perfect thing for our back entry above the mission storage bench we are painting black for our back room. It's actually pretty light-weight, but we will hang it with anchoring screws, anyway. I think it will be perfect this fall and winter for hats, scarves, gloves, and of course, keys.


Next, I found this lined wire basket with ties. I liked it right away for it's rustic farmhouse look, and they were all numbered the same as my shelf. I picked the number three, again for the three of us, plus three's are kinda cute, don't ya think?


The lining is a thick heavy cotton, with a burlap look. I'm not sure what exactly I will use this for in my living room, but I'm sure I will figure something out!


If I had a large entry, big enough for a larger bench, I would love to have purchased all three of these to line up on the bench or seating in the entry for storage. After we finish the entry back there, maybe I will have a place for two more. They go with the shelf so well, and match my back room perfectly.


I'll post updates as soon as the entryway is done, so check back! If anyone has suggestions, I would love to hear your comments. I'll post pics of the entry soon, and what we would like to do with it. There are so many great ideas on Pinterest, I have a Board dedicated just to entryways and mudrooms.


I also found a furniture factory cart there for sale. It is considerably cheaper than this one from Restoration Hardware, but even on sale (it had some cracks, and a few gouges from the baskets like the one I bought being scraped across it), I didn't want to pay that much. Especially if I would have to sand it a bit and re-stain it and Polyurethane it. I'll keep my eye on it and see if it goes down in price a little more. Unfortunately, the Ashley website didn't have a picture of it to post here, but the one from Restoration Hardware did...Furniture Factory Cart

Gotta say... I love it, but we'll see. Maybe if I can find some old casters I can make one out of some pallet wood. The one at Ashley was pretty large, I don't know if my living room will accommodate it...   Oh well, a girl can dream!

The first place I saw this was Pinterest, but I found a FANTASTIC blog by a woman named Diana, who is great at making just about anything. She is a true DIY inspiration. Visit her Blog Our Vintage Home Love, and see for yourself.


Have a great weekend...P.S. did any of you start a compost pile, yet? :)