My most valued possession is my family. Even if you are living in a box
somewhere, and you have the love and support of your family, you will always be
wealthy. Love really is all you need. From love, great things will emerge. From
your thoughts, you can create greatness.This is what I need to remind
myself of everyday to be the best person that I can be. Live your life with
gratitude. Be thankful for all that you have everyday, even if it is your eyes
to see or your ears to hear or your feet to walk or your hands to create.
Understand your place in this Universe; how infinitesimally small you are, but
how huge a contribution your Spirit is. Don't wear blinders to the world around
you, you're not the only one here. Be kind, considerate, don't be judgmental,
love others, and yourself. Know that you are perfect inside; that you are
love.


Saturday, January 26, 2013

Winter shots and January outdoor pillow covers

Well, hello, there!

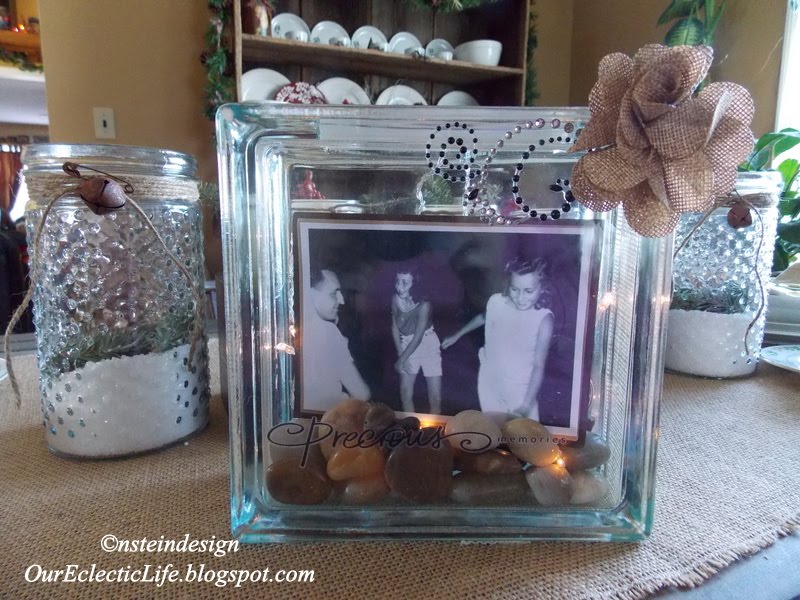
How have you been? Surviving these cold winter months (if you live in that climate, that is)? How about the start of a new year?

Well, I guess it's sort of the end of the start of the new year, huh? I, like many of you, have been busy, as always, but I've still been working on some projects. I can't wait to get started on the really BIG ones, though. I've got some fabulous chairs to refinish, some tables, a bench...a lot on our plates, all while Noah is still remodeling and refurbishing things in the house, like the 116 year old staircase we are re-doing (we wouldn't be if it hadn't already been done with boards, not stair treads, in the 80's). So there is a lot of measuring and cutting going on behind me right now, as a matter of fact...

Anyway, I finally got my winter outdoor pillow covers done, almost just in time to change them for Valentines day, but I finished them Monday. Of course, like all my others, they are playing double-duty. I'm showing you the January/winter side now, and will reveal a surprise in February.

I am hopefully also finishing up some stenciled throw pillows for my couch later today, and I will share those with you soon, as well.

So, I pretty much made these the same way I made all of the others in my Fresh outdoor Autumn porch decor post. I just lay my pillows onto the fabric I want to use and trace with a disappearing ink pen. Before I sew them together I figure out what I want to decorate the front with and assemble all of that on and sew that to the face of the pillow, then I sew them up leaving a very sturdy hemmed opening at the bottom to remove the pillow for storage. I like to use twine for the closures and just hand sew knotted pieces of that evenly spaced to tie shut.

*(View the photos in a separate gallery by clicking on them for better views and to page through like a slide show.)


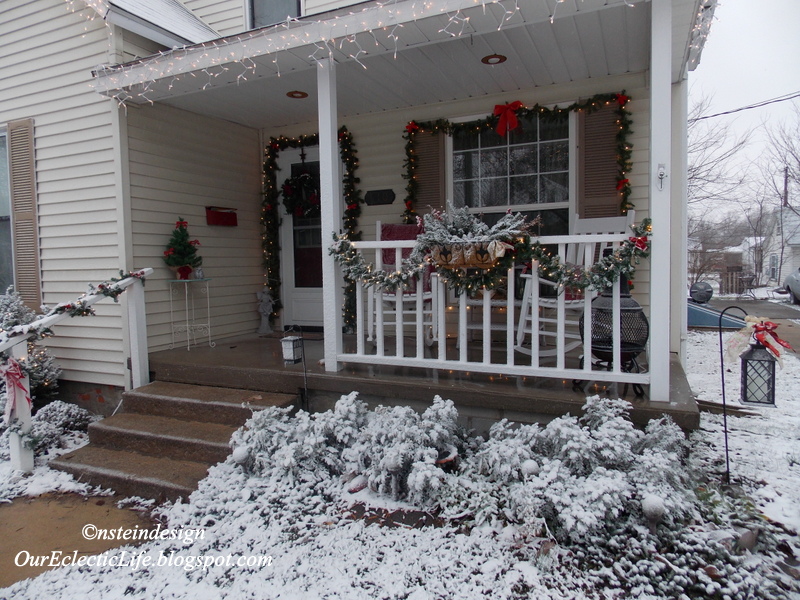
First I wanted to share with you a few shots I got after the rain froze on our greenery...so pretty...


Now for the pillows...

I wanted to do a white on white neutral pillow using a natural winter theme. I took some of my greenery from the baskets outside (I've left all of the greenery minus the Christmas decor for January in the hanging baskets outside). None of it dried out as of yet due to the rain and soil that's in them, so I had nice flexible branches. I had never done this before so I practiced a little. I definitely wanted the stem of the branch to be in the image and wanted it in white so I poured out some white acrylic craft pain and sponged it on. The first try dried too quickly, as acrylic paint tends to do, so I didn't have the greatest transfer of my image. I mixed in a little water and worked quickly and I think it turned out pretty good. It's a little heavy on the paint in spots, but I decided I kind of liked that. It has a very organic handmade look. Just what I was trying to achieve, really.


I wanted a little more than just plain raw-edged Osnaburg as my decoration, so I decided to pull out some white satin ribbon and detail the edges. I glued the ribbon on, tucking the ends for a tailored look, using Liquid Stitch (it really works!) and let that dry. When that was dry, I decided I wanted a little more of a natural earthy feel to off-set the delicacy of the ribbon, so I pulled out the twine that I was planning on using as the tie closures and measures four pieces long enough to tie together into knots at all four corners. I glued the knots down a bit and let them dry for a few, then sewed each one on with a zig-zag setting on the machine using a neutral colored thread. (I know, I know...a bit more trouble than I thought, especially for an outdoor pillow, but I had a vision, ok? :)


As for the vintage toolbox and lantern...I just left the greenery and pine cones in and left it natural, neutral and wintry.


I just thought it was important this year to keep something fresh and colorful (or natural) on our porch even in these winter months. It gets dark so quickly, and is so cold some days you don't even want to go outside. So, when we do have to go out, and while we are longing for warmer days, it's nice to come home to a welcoming porch, I think!

How have you been beating the 'winter blues'?  Any projects in mind? Anyone out there lucky enough to be taking a vacation somewhere sunny and warm?

Well, that's it for now, but I've got some Valentines projects under way and I can't wait to share them with you! Do you have any special plans in mind for the Most Romantic Day of the Year?

As always, thanks for stopping by and have a great weekend...(and don't forget to stop by my sister blog confessionsofathinkaholic-ns.blogspot, I've just posted some new stories to warm you up)!

Nanette


Sunday, January 13, 2013

Glass Block photo project

Hi there!

I wanted to share a project with you that I made for Noah's Grandma for her 80th birthday on January 1st. We had just had Christmas with her, and I always save something special for her birthday. This year was especially important, as it had been such a tumultuous one. I wanted to make something for her that was personal and brought back some of the fondest of memories, as well.

Noah lost his Grandpa in 1998, so his Grandma has been without him for all this time. She is a strong and enduring woman, but gentle and kind. We are very close and she means the world to us. When she also lost her daughter this June, it was a devastating thing, but the family absolutely became closer than ever. I wrote about this triumph in tragedy in an article I wrote for Tiny Buddha that you can read about here, if you're so inclined.

Anyway, when we were waiting to book a flight to be with Noah's dad and sister's, we were going through pictures that Grandma had of the family all the way back when her girls were small. We needed some to make a couple of display boards for Noah's mother's memorial service. I picked some beautiful photos of Noah's mom, and the family photos of his Grandma and Grandpa and their young girls in the 1960's are just priceless. This was, and is, a loving family with thousand's of beautiful memories to last a lifetime. I now know, without a doubt, how my husband turned out to be the wonderful, kind, gentle, loving man that he is.

The picture I chose for this project was one of my favorites. (My other favorite is almost exactly like this one, with Noah's Grandpa in profile at the left of the photo steering their boat, his mom in her life preserver and cat framed sunglasses facing the camera, and his aunt on the right hand side, all smiles). This photo was taken at the American Legion when the Twist was just getting big, about 1960. Grandma must have been taking the picture, she was hardly ever in any photos...you still can't catch her to get her in one!


I started with a glass block that I got at Hobby Lobby at 50% off. That's $6 bucks, people!! I bought two types of lights. Mini white Christmas type lights ($1.99), and these tiny mini battery operated ones ($2.99). I chose the latter because they fit inside the hole in the plastic "plug" in the top of the block so perfectly.


I had some decorative multi-colored river rocks that went well with my color scheme. Those were free!  I picked two colors of card stock that I had on hand, a dark chocolate brown and a mocha colored one and double matted my copied photo. I placed the rocks in first, just gently dropping them in and using the smaller ones to fill the little empty spaces at the bottom. Then I fit my photo in. I used a 4x6 with mat of about 1/4 inch. I just nestled it in amongst the rocks, but I didn't get too fancy just yet...adding the lights, I knew, was going to be a challenge.


I picked up some scrapbooking notions at Hobby Lobby, also on sale for 50% off. The "jewels" came on a pretty big sheet, enough for two or three projects. The burlap flowers came in a pack of two. There is such a wide variety of these and they can be used for so many different projects. Both were self adhesive and that was enough to get them to stick to the glass. I even repositioned them a few times, and they still stuck very well. I just decided which section of the jewels I wanted and clipped it off with a scissors.


 I also bought a sheet of black rub-on's with a ton of family oriented sayings, you guessed it, on sale. I cut out the piece I wanted to use and taped it in the spot I wanted it placed. This was also easily repositionable.


 Since I had the rocks and picture already positioned, I could not turn it on it's side so I had to keep the rub-on taped to the glass and rub it on that way, but it worked just fine. You certainly could do the rub-on first, but you have to be careful not to scrape it off while assembling the rest of your block.


Here's a close up of the flower and jewels.


 A different angle of the rub-on and the lights.


Now, because I left the plastic plug in the top, I needed to cover it up. I picked a lighter burlap and just wrapped it around and glued it on the bottom. (Noah held the piece up for me and I just glued the one end to the glass and the other end to the burlap.) 


 I took the plastic plug out and pushed the lights down through it into the glass block. I used a pencil to arrange the lights so that they were around the picture and behind it enough to hold it up. I left a long enough cord to leave plenty enough slack for the battery pack to be placed behind the block on a table.


 I used glue dots to secure the cord in two different places on the back of the block where they were hidden by the edge or the photo.


 Here's a close up of the lights down in the rocks. It took some finagling, but I got it just how I wanted it.


 The finished product. It really does glow nicely in the dimmer light. This is one of my most favorite projects.


So, needless to say, it went over well! She loved it, and I loved making it for her. She is so special to us, anything I do can never be enough, in my eyes. After losing our Moms, our relationship is more precious than ever.

I hope this gives you inspiration to make something for your home or a meaningful gift for someone special.

Have a great day!
Nanette


Saturday, January 12, 2013

Our First Snow

Hey, everybody!

Did you make it?

Through the holidays, I mean?

I know this post is a little late, but better late than never, I guess. I just wanted to share some photos of our first snow that we got a few days before Christmas. It didn't stick around long, but was so pretty coming down. That Thursday was pretty blustery. We had to run out to do some last minute errands, and it was so cold and windy. By the time we got back home, though, this is what we found. It was a great day to cozy in and watch movies...


At the time I'm posting this, we're due for another round of snow. So glad we're staying in this weekend!
Have a great one!
Nanette

Breakfast with a Magestic Fellow


Happy Sunday, Everyone!
The other morning while I was driving home from work along the Great River Road I was keeping an eye out for Eagles. This is the time of year when they arrive to nest along our branch of the Mississippi River. I took my camera along with hopes of capturing at least one photo of the iconic bird that perches in this one tree close to the river. He (or she) is not in a nest, but out hunting and keeping an eye on the river and river bank, I suppose. Well, he wasn't there but I noticed a car pulled over on the opposite side of the highway. I turned around and pulled over and spotted this guy having his breakfast.


He has a huge fish in his grip and I now wish I had video of this but I was just too afraid to switch modes on my camera for fear of missing a good shot. I don't have anything fancy, just a Nikon Coolpix L810. It's just more or less a point and shoot, but it has a 26x zoom and quite a bit of great settings for a beginner. Eventually I would love a more professional camera, but I need to learn how to use it before I spend a lot of money on one.


I wasn't really sure if this was a male or female, so I went online last night and found some awesome YouTube videos from a live feed of Eagle watching. You can view the ones I watched to figure out this ones sex here and a very endearing one of a mama Eagle trying to feed her very independent three day old Eaglet here. But be careful...these amazing animals are addicting to watch!

Anyway, I thought this one was quite small when I was watching him, and believed him to be a young male. After watching the very good video above, I believe that to be the case. He's eating alone, too, not taking his prey to a nest, though I don't know if that even has any significance. Males are about 30% smaller than females, have brighter heads and more distinct eyes (or 'guy-liner' as the first video above will tell you). My camera zoom was maxed out, or I would have a much closer look...  
(you can click on the first picture and be taken to a gallery of the pics in this post and they are bigger)


Look at that! This was such an awesome experience. I know of a place nearby where a family has always nested for all the years that I've lived here. I've not checked this year yet, and I know my camera probably will not be able to zoom as close as I would like, but if I get that sweet little family, I'll be sure to post something about them!


These next two are blurry, he was moving so fast I didn't have time to focus. When he had enough fish (or maybe enough of our watching, perhaps) he took off out of that tree and flew right by us over the highway and out over the river. Now, that, I wish I really had on video!


I hope you liked this post, and it encourages you to go out into your own local environment. There is so much to see and learn from nature, as you'll find from the Eaglet video. It really is so sweet. If you have any Eagle watching experience or information to help enhance our viewing experience, please comment! I would love to hear from you!

Have a great rest of the weekend and a fabulous week!
Nanette