My most valued possession is my family. Even if you are living in a box
somewhere, and you have the love and support of your family, you will always be
wealthy. Love really is all you need. From love, great things will emerge. From
your thoughts, you can create greatness.This is what I need to remind
myself of everyday to be the best person that I can be. Live your life with
gratitude. Be thankful for all that you have everyday, even if it is your eyes
to see or your ears to hear or your feet to walk or your hands to create.
Understand your place in this Universe; how infinitesimally small you are, but
how huge a contribution your Spirit is. Don't wear blinders to the world around
you, you're not the only one here. Be kind, considerate, don't be judgmental,
love others, and yourself. Know that you are perfect inside; that you are
love.


Showing posts with label vintage. Show all posts

Tuesday, June 3, 2014

Vintage Book Paper Wreath

Hello again!

I hope you had a great weekend enjoying the beginnings of Summer. I wanted to share another post from a few months ago of this great vintage book paper wreath I made at Christmas time. I searched through my favorite craft pinning site (a gold star for whoever guesses what that is) and came across several beautiful wreaths to choose from. I picked this one from jadeflower. I put my own twist on it and this is what I came up with. 

For some reason this year I had a little trouble remembering to take photos of the step-by-step processes I took for many of the crafts I have posted. Shame on me. Really, though, because that's the most important part. I guess I was just so harried for time, I forgot. I'm usually a stickler for these things, just look back in the blog and see for yourself. Go ahead...I'll wait...

You back? Find anything you like back there? I hope so! 

Anyway, I'll try to make it up to you with my future posts. I've got a lot coming up. There might be a French chair make over, a couple of side table make overs, a couple of cane back chair re-do's...like I said, I've got plenty of opportunities to make it up to you. 

This wreath was originally made for the Holidays, but I have left it up in my kitchen (away from the stove so it doesn't get splattered) since Christmas and it still 'works'. 

I went to a yard sale the Autumn before and bought up a bunch of their books on the last day, right before close, so they were an absolute STEAL! Now, I don't necessarily condone damaging books, but these were yard sale finds and were already pretty old and damaged. I bought several that I kept for entertainment, as well, though.

Anyway, I got all of my materials ready that I needed for my wreath:

* Tons of book pages. You want to make sure you have plenty on hand to go through so there is a variety of page colors, edges, and actual prints to choose from. (note the fox, chapter numbers and titles I worked into the folding process)

* Glue gun and glue. In the tutorial link above, she used a glue stick. This is fine, it will hold. But, from my scrapbooking days, eventually anything I glued with a stick came loose after a while. Tacky glue will definitely hold-forever-but I just love my glue gun. The only thing I don't care for is the 'strings' you have to watch out for. I'm a bit of a perfectionist and I will pick every string off of a project. It's just unsightly to show your glue. 

* Scissors, circle cutter, punches, embellishments, chipboard letter, craft paint and paint brush, glitter...anything you might want for your center, IF you want one. There are tons of beautiful wreath tutorials out there without centers. Even some to look like Dahlias. I'm SO doing those next!

* Cardboard or another sturdy base for your rolls

* Mono filament (fishing line), twine, ribbon, string. Anything you like to hang your creation.

* A small square of felt to cover your glued-on hanger

Here is the wreath in all it's glory. Scroll on down to learn how I did it. Again, I'm truly sorry I did not think to take pics during my process. I'll be working on another project soon so I'll make it up to you...promise. In the meantime, search these out on the web. There are some fabulous girls out there with great blogs! (uh...just don't go too far, ok? ;)


Ok, first thing you want to do is roll your book pages. I experimented with the size I wanted. I used a large hardback book. I took it apart first, so that my pages would be free, trimmed off any glue left from the binding, and separated them a little by color. Some older books yellow with age, and I love that, but some of the pages within the same book don't do this. I just sort of flipped through it and separated them. When I had a good pile of pages, I started to roll. Now, this wreath is pretty darn big because I used a large book. The smaller the book, the smaller the wreath, obviously. But, I did try to trim the book pages down a bit to make the wreath a little smaller. You have to trim equally on the bottom and the one side that won't show as much, so that it doesn't look like they've been trimmed. This didn't work out the way I'd hoped. You're better off just using different sized books. And the fact that it was hardback vs paperback does not matter at all. Just get one and start crafting!

Figure out which pages you want to use, like what chapter numbers you like, any pictures, words, titles, etc. Then you roll the paper like a paper cone, starting on one corner. Put a small dab of glue after you make your initial roll to secure, and roll it up. You can go as tight or loose as you want, you'll figure out what you like, and I put a little glue along the ridge where the side of the page lay against the roll. One down, A LOT more to go! Hey, it's meditative...and relaxing! If anything, you'll get a lot of thinking done. Put on some music or catch up on a show while you roll...


Next, is the assembly. You want to cut a circle of cardboard as a base that your rolls will be glued to. Then you want to lay those rolls out before you glue to make sure everything fits. Ok, here's where a leetle frustration might come in. Don't get scared. When you are laying things in a circle, like these rolls of paper, it might take a few tries to get them to lay where you want them. You need to figure out how far 'in' to the circle you need to go to fit them all in snugly and with as few gaps a possible. Sometimes this is near impossible because of the size of your circle and the size/number of your rolls. If you play around with it, it will work out, but you don't want to start gluing until you at least do a dry run first. 

In my photo below do you see how there appears to be two layers of rolls and cardboard? It's the only way I could fill in the gaps that I couldn't fill in with my initial layer. I laid it all out in a way that was pleasing to my eye and that looked even and symmetrical. But, still there were gaps that I couldn't quite fill with more rolls. So, I glued it down this way. Then I identified where the gaps were, flipped the whole thing over, and glued the few extra rolls to the back of the first cardboard circle, to fill it in. I must say, after I was done, the wreath was fuller, and you can't even tell it was a "mistake". I used the mono filament for a hanger. I did use hot glue for this, as well, but you can use tape or anything you like. If you use hot glue, you have to be careful because it will melt your filament. I measured my length of filament so that it would not show while hanging, tied the two ends together a couple of times to get a good sized knot, and put a dab of hot glue right on the cardboard. I let that set up for a few seconds and placed my filament, knot side down, into the glue. I had cut a small square of felt to cover this and glued that down over the knot, as well. Then I made a second cardboard circle to cover the back for aesthetic reasons and glued that right over the second layer of rolls. 

Whew! That part is done!


Here's the back all finished and glued. You could even cover the cardboard with paper or felt if you wanted, but you never see it, so why not save a step? This wreath is work enough, right?


Alright, now for the embellishment. I folded a cute little paper medallion out of a smaller page. I learned how to make these from searching Pinterest and founds this tutorial from cityfarmhouse.com. I didn't use as many pieces of paper, just two, but it was all I needed for this wreath. I just "fan folded" two equal sized pieces of paper, as shown in the tutorial, and glued them together. This time I did use the Tacky glue. I also glued the folds where I felt they might spread out too far. While I let that dry, I made my center. I played around with colors and ideas and settled on this. I used a circle cutter and cut this circle out of black textured cardstock. I put a little Tacky glue on some scrap paper and rolled the edge of the black paper lightly in it, then I rolled it in some vintage German glass glitter. While I let that dry, I used a scalloped paper punch to cut a second circle of cream cardstock. I have a bunch of chipboard letters so I painted our initial with black craft paint. I punched a little butterfly from a piece of the scrap book paper left over and when all the pieces were dry, I assembled it all with Tacky glue. I then glued the finished medallion to the wreath with hot glue. 


Done! I just LOVE it. I recently went to the local antique shop uptown and came across some very old books of sheet music. I have seen a lot of fab projects using old music pages, but wondered where in the world I was going to find some. It was my lucky day, because I came away with a bunch. Can't wait to show you what I do with that!


I really hope you try one of these for yourself. The results are stunning, and it's not really as hard as it looks. And you can start smaller, or just make ornaments for your tree, packages, wall art...it's endless.

I'm so excited about these types of paper projects, I just might dedicate a whole post to introducing you to some fabulous blogs out there with the most beautiful and easy projects to fill your summer with...and get a head start on the holidays! Wouldn't that be nice? Having things done months in advance for Christmastime? Less messin' = less stressin'!

Have a great week and as always, thanks so much for being here. I truly appreciate you.

Nanette


Friday, May 30, 2014

Family Photo Gallery Wall


Hello friends...

Were you waiting with "baited breath" for today's post? Thought so...lol. I wanted to show you my Pinterest inspired gallery wall. While browsing through that infamous site, I would often come across these fabulous wall displays boasting family photos, monograms and eclectic décor. I wanted one. It took me several months to perfect mine, and I still tweek it every so often, but I got it.

This first picture is one I took in November, I think. ( I keep many, many pics in my phone; too many, actually, but this time I'm glad I had them. They were there just waiting to be blogged.) I had found this little handmade primitive-style ladder in a shop in town for very little money. I knew right away what I wanted to do with it. I had all of these black frames laying around so I went to Walgreens and copied some pictures of my family for them. I also bought the one in the far left from Wally World for less than $5.  

The rusty star I had for some time, I picked up the little white bird a some craft store for just a couple of bucks, I got the little "S" and the "Family" from Hobby Lobby, on sale, and also the papier mache "S" from there, too. I'll show you what I did with that below.


Here is the wall finished, so far.  There are two very old photos of my mother's family on the top of the ladder, either side. Noah and I on out anniversary this past October, a hand stitched artwork of leaves and acorns I did several years ago ( I really need to change that, it is summer, after all), the papier mache initial all decorated (again, I'll show you what I did down below), and some fabulous paper bag flowers that I saw on, you guessed it...Pinterest. Just click the link and you can learn how to make them, as well. The flower decoration on the "F" of the "Family" sign is a splurge purchased at Cracker Barrel this past Christmas time. I bought two at $5 each. They are actually hair clips/sweater pins. I wish I got a close-up for you. I LOVE these.

The rest of the photos are important pictures of my mother, son and my siblings and of Noah and I; we have never taken photos together much before these past few years. I never liked to be in pictures. Ladies, you get that, right?


So, now for this decorated papier mache monogram. I searched and searched Pinterest for something like this, but never found quite what I was wanting. So I sort of put several ideas together and came up with this. I painted it with grey craft paint and distressed it a little, then I dry brushed a bit of white all over it for just a touch of Shabby Chic. I have decided to actually repaint the house in cool grey tones soon, but this will have to do for now. Anyway, I wanted something with that new trendy chevron on it, but didn't want to go overboard. I just painted it on free hand. Then I hot glued the twine to the back and covered the ends of the twine with felt, that I also hot glued on. Next, I wanted to decorate it with those nifty burlap flowers I kept seeing. These were actually the first flowers I ever made, ever learned to make. I watched some tutorials:  


...and attempted my own. I put my own little twist on them, adding leaves of different dimensions, but the burlap rose was a little difficult; the folding was a bit hard to follow. Actually, this technique still is for me. Everyone seems to use it for all kinds of fabric flowers, but, for some reason, I just can't get the hang of it. Oh well...practice makes perfect, I guess.


Well, there you have it. This is what has satisfied me so far with this gallery wall. I'm pretty positive that I will be adding and changing this up in the future. I'm also pretty sure I'll be sharing that with you, too, so please stay tuned!


Do you have a gallery wall in your house? Where did you get your inspiration? I have a blank corner above our television that I'd like to decorate. I've been searching what to do with that, next. Any suggestions?

That just gave me an idea for a new post!

Have a great weekend, and as always, thanks so much for stopping by. Feel free to share! I truly appreciate you!

Nanette


* All opinions are my own. I receive no endorsements from any sponsors mentioned in the above post: Hobby Lobby, Wal-Mart or Walgreens.


Sunday, February 3, 2013

Precious little vintage items

Hey, Everybody!

Hope your weekend is going well! I'm working on a lot of things right now, but took a little break and went with my sister to this craft and antique mall that I actually used to have a booth in called the Alton Exchange (you can also check out the facebook page here ). I found a few little things that made me oh, so happy and just wanted to share them with you today.

I love, love this place...it is so well organized and there are a TON of booths to give you so many options to find something special. Plus, Terry is one of the greatest gals around; she works so hard to make the experience in her shop one that will keep you coming back time and time again.

As I wandered the rows and rows of unique and ever changing vintage, antique and handmade booths, I picked up a few things that just seemed to pop out at me last night.

Here's what I got...


A closer look will reveal a couple of little facts about us, I guess...


These little 'ashtrays' were just sitting on a shelf together. I got both for only $5! They were pristine and unused. I thought they were the cutest thing for a bookshelf or table. Had to have those...


 I also happened upon a rack with many different pieces of jewelry. These little handmade bead bracelets were only $2! So, of course, I had to have two! Sure, I could make them myself, but I really do love supporting local artisans whenever I can. I think it is super important to buy local and to support the creativity in each other whenever we can.


I am obsessed always on the lookout for old wooden boxes, cheese boxes, sewing machine and cash drawers, etc. My sister snatched up the sewing machine drawer that we saw at the same time (a little healthy competition is good, right!?) but I found this little guy on a shelf, and it was only about $5! A vintage Wisconsin cheese box--right up my ally. I've got some ideas stirring around for this...


I seem to unconsciously be drawn to the color turquoise (or teal). I hadn't realized this until I was putting all the pictures together...


I also picked up a 10 yard roll of burlap garland. Now, I know I just bought some of this in St. Charles that I used on my Christmas tree that you can read about in this post, but this is a little bigger, and it cost half as much...HALF!!!  At only $12 bucks...imagine all the possibilities!


The other thing I found was just about as random as you can get. Up on a shelf I noticed this Jewish/Hebrew item. It had definitely been used, and I was curious. Noah and I are always on the lookout for unique items to honor his Hebrew roots and this was too good to pass up. It's a napkin holder, of all things! When Noah met us at the Exchange after work (yep, ladies I've got a husband who loves to go antiquing as well as work on Hot Rods in a garage!) I showed it to him and he had to have it. He said "That will look great..." and we both finished simultaneously with "...up on a shelf in the kitchen."
It's great to be married to your best friend.  :)


Anyway, I hope my little findings inspire you to go picking through an antique mall in your neck of the woods. Imagine the treasures you could find, not to mention how happy you can make some local vendors, right?

By the way, I have a big P.S. As you may already know, I have another blog called confessions of a thinkaholic. I also regularly submit blog posts to a fantastic website called tiny buddha, and my newest (and third) post is up on the site. You can read it here, if you're interested. It's titled "Letting Go of Fears and Worries About Getting Things Done." I so appreciate it if you do, but no worries if it's not your thing! Both my blogs are completely judge-free zones; I just want you to enjoy yourself while you are here.
Just know that I appreciate you and am so happy you stopped by today!
Nanette

*Coming soon...Valentine's Day decor!

Saturday, December 15, 2012

Indoor Christmas Decor


Well, it's taken me a little while, but I'm actually starting to pull it all together. I'm enjoying my weekend and slowing down a little. I wanted to share some more of the traditional decorations we use each year, as well as some new projects I've completed.

First up is this mini tree I purchased years ago to decorate with this mini Noah's Ark ornament set we collected over the years, as gifts from Noah's parents.


I also bought this little tree at the same place that I bought my Barnwood hutch also in this picture. It reminds me of the little feather trees. I found these little bottle cap ornaments that have vintage pictures of Santa and Snowmen and the words 'Believe' and 'Merry Christmas". These are very easy to make on your own, though. I did it last year for my Halloween tree with bottle caps I bought at Archivers, craft/floral wire, Crystal Effects (a scrapbooking item. It's a clear glue medium that dries hard), and Halloween scrapbooking paper. I just used the punch that matched the diameter of the bottle cap (they are pretty standard to match) and put a little Crystal Effects on the inside of the Cap, placed the paper in, covered it with a generous amount of the CE and let it dry over night. Noah used his Drimmel rotary tool to drill the holes (before I got them decorated) and when they were dry, I threaded the wire in, twisted it and made a hook. I made a ton of them! This year, though, I'm short on time, and at only $1 a piece, it was worth the shortcut.


I also got this little star topper for just a couple bucks there, too. It was too cute to pass up. It's perfect for what I needed, don't you think?


Here is the Santa Claus tea service I bought from a gift shop years ago. It's a good thing there are only three of us...there were only three cups left when I went back to buy it. It comes with a nice big cookie jar, too.


Here's the Barnwood hutch decked out. I may or may not be re-arranging things a bit...again...always experimenting!


Here are my Mom's Nutcrackers.


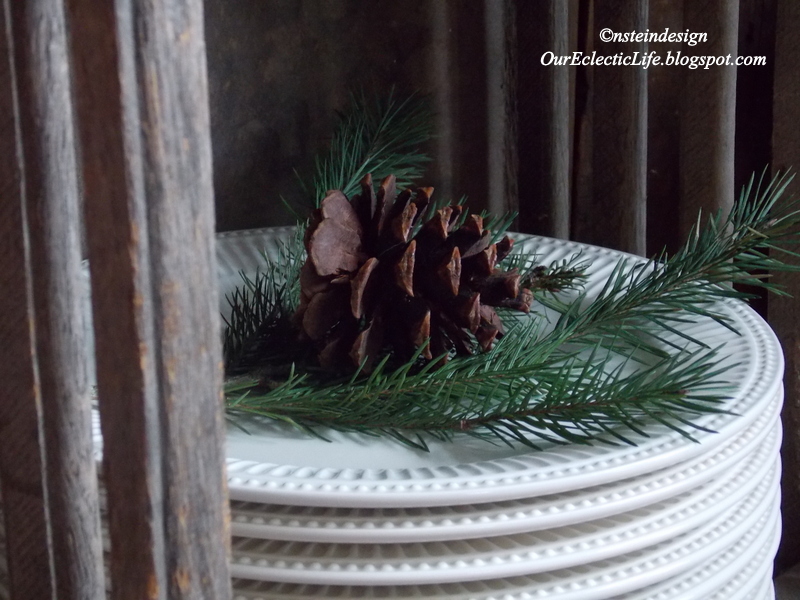
A subtle bit of greenery on my stack of white plates. Always a bargain hunter, I picked these up at Wal-mart for just $1 a piece. They are heavy ceramic made by Better Homes and Gardens. I just love the simplicity of that Ironstone white look. I used them on my Thanksgiving table this year and was so very pleased with how they looked.  I was recently in a Deals store and picked up perfectly matching white ceramic mugs for just a buck a piece, too! You don't have to spend a fortune to dress your home. Besides, if one gets broken in the wash, it won't break the bank. Plus, I bought plenty, so we won't run out too soon...


Here's another project I did. Last year at the large craft show my mother and I always went to for all the seasons, I bought this old sewing machine drawer. I love old wooden boxes, so this was a must. I was at Old Time Pottery (a favorite of mine. Have you ever been to one? You can find a lot at a steal of a deal!) and I bought these little glass apothecary jars for $.50 a piece. I did splurge on the flameless mini pillars, though. They were $2 a piece, but made with real wax and are scented vanilla. I put some Epsom salt in each of the little jars (a 32 oz or 2lb box of Epsom salts at Wal-mart was only $.88) and placed the 'candle' right on top. Just sort of twist it down in there, and it looks like it's sitting in snow. I took some of my twine and tied it around the top of the jar.


Next, I took some of the flower foam (the kind you soak with water for real arrangements) that I had leftover (keep everything!) and cut it to size. I placed it in the drawer, covered it with some sheet moss (I bough a ton of it on clearance last year at Michael's), and stuck in some of the branch clippings from our tree, some berry picks I already had, some pine cones, eucalypytus sprigs, and that's it. A woodsy-winter centerpiece!


The next thing I did was to fill this old ammunition box with winter greenery to place under my console table to hide the cords. I purchased this box at the same booth at the same craft show I bought the sewing machine drawer from. We didn't notice until we got home that it was made in Alton, Illinois. Pretty neat since we are from that area and traveled over an hour to go to this show!


You see how the power cords for the tree, lamp and snowman light are all unattractively hanging down exposed to the rest of the room? We usually don't have this many cords here, but because of the decorations, we do. We also usually keep the dogs basket of toys and babies under there, but I moved that under the chair, and used the vintage ammunition box filled with greenery instead.


                               Problem solved!


I used this red metal mailbox that I bought several years ago in the same gift shop that I got my tea service to hold some flocked greenery and one of my mercury glass ornaments I mentioned in my O' Tannenbaum post. Last year I had them all out, but just a few will do this year. I loved mixing the new ornaments with the vintage on our tree this year. I know mercury glass is, in essence, vintage, but I have some more modern ornaments in silver and that are mirrored and these tied it all in so nicely, so, on the tree they went!


This is a snowman lamp I made inspired by a pattern I bought from Tennessee Ridge Primitives. I found this little snowman hat at a craft store...it was perfect! I bought up a lot of these lamps at a shop in St. Charles, every time we visited. At only $3 they are an absolute steal! Everything else I had on hand, and handmade the whole thing. One of these days I swear to myself I will start selling on Etsy...all a matter of time...
I have such an eclectic array of what I like to do, it can get overwhelming if you don't organize well.


A friend of mine posted her great find of a large $10 owl like these on Facebook. She settled for the two smaller ones at $5 each. I had to have them, too. They were cuter than the one large one, and at $10 for two...I thought it was worth it ;)   The Advent 'calendar' in the background will be looked at in detail in the next post, along with quite a few more projects, so stay tuned!


This is an antique sleigh and Santa with his elves that belonged to my Grandmother. I remember sitting and looking at this all the time as a child. How special it is that I have it now. (The little pine cone in front of it is one of a matching pair Tyler and I made in Scouts. I put them out every year. It's been about 9 years and counting!)


Another little display, and my Christmas tree clock I bought years ago. It works and, if I would put the batteries in that part of it, plays a Christmas song every hour...
On top are the little Russion Nesting Doll inspired nesting Santa's I got from my Mom.


Here is a mason jar decked out with a vintage Santa image I bought at that same craft show. I paid a whopping $5 bucks!! I bought them for family members to go with their gifts. This is something that I would make, but at only $5...I love supporting a local artisan! It is one of my favorite things. With a little flameless tea light, it's just perfect.


 The Nesting Santa's


Here are two projects I made in 2008 when I had a booth at a large craft and antique mall in Alton. I sold them, but made them for myself, as well. The snowman is made from chenille, and the Santa, or Mr. Kringle, is from a pattern I bought and followed from Primitive Blessings by Twigs N Sprigs.  This Mr. Kringle is one of my all time favorite dolls I've made. I hand stitched his face and used real Alpaca wool for his hair and beard. That's a baby sock I primmed up to hold his winter fare!


Here's a little vintage snowman I was inspired to draw up from something I saw online. He's been around for quite awhile. I used one of my mini pumpkin stems painted orange for his nose. Like I said...keep everything! Pretty darn cute, huh?


I hope some of these projects inspired you to do some of your own. My next post is going to have quite a bit more, so check back! There are some really quick, cheap and easy ways to spruce your home up for the holidays, or make a gift or two for friends and family.

At the time I am working on this post, I've heard about the terrible tragedy in Newtown, Conn., as I'm sure many of you have. I am writing a post for my sister blog, Confessions of a Thinkaholic about my feelings about this. I'll put the link to that in my next post, if you are interested. I just ask that you keep all of those affected by this, including each other, in your thoughts and prayers. Now is the time to band together and pray for a better life for humanity. Hold your loved ones close, make fond memories, remember those less fortunate, and have an air of love about you...that is the cause and effect we need.

Thank you so much for reading, and the brightest of blessing to all of you.

Nanette