My most valued possession is my family. Even if you are living in a box
somewhere, and you have the love and support of your family, you will always be
wealthy. Love really is all you need. From love, great things will emerge. From
your thoughts, you can create greatness.This is what I need to remind
myself of everyday to be the best person that I can be. Live your life with
gratitude. Be thankful for all that you have everyday, even if it is your eyes
to see or your ears to hear or your feet to walk or your hands to create.
Understand your place in this Universe; how infinitesimally small you are, but
how huge a contribution your Spirit is. Don't wear blinders to the world around
you, you're not the only one here. Be kind, considerate, don't be judgmental,
love others, and yourself. Know that you are perfect inside; that you are
love.


Showing posts with label pillow covers. Show all posts

Friday, February 1, 2013

Valentine's Pillow Covers and Wreath


Hello! Hope your week is going great for you, so far.
Monday I finally finished up my little Valentine's Day wreath. The pillows have been done since January, because I always like my pillows to do double-duty so I can just flip them around when necessary. It really saves time and space. Less to change out and pack away! I made them the very same way I make all my pillow covers. You can see a quick tutorial here of the original pillow covers I made for Fall and the flip side of these covers for my winter/January decor right here.


I used muslin as the material for the front and back cover, and a red and white ticking for the front decorative panel, and sewed that to the muslin. Then I used some creamy white chenille fabric and some burgundy wool felt for the hearts. I just cut those out and placed them where I liked them, pinned them to the ticking and sewed them on. I was then able to sew the two panels together, leaving a good enough sized opening at the bottom for my pillow to be slipped in. While it was still inside out, I folded the hem of the opening over and pinned it and sewed that to make a good sturdy hem for the closure. I turned it right side out, and hand-sewed the twine on for the tie closures. All this is detailed in my winter pillow cover post.


Don't you just LOVE these flowers?! I found a tutorial of these on that Pinning site...you know the one. Here's the link to her blog Ruffles and Stuff, where I learned all about making them. It is a CUTE little blog!


Anyway, I picked through my fabric stash (I love fabric and buy a yard or two when it's on sale whenever I get around to getting to a fabric store and quite have the impressive bookcase full little stash!)
I decided on what reminded me of sweetness, romance, love, and Valentine's Day!


 I made them over the course of a week or so while watching telly or having a "crafting moment" on the weekend and made enough for the projects I wanted to complete for February. I will be making a lot more for next months wreath that I want all year 'round on the front door with our initial and some of these flowers in a larger scale. I'm working on that this weekend!


 I had been milling over what type of wreath to make for the front door for a while, and I was actually just going to buy one of those ready made store-bought hearts with all the sparkly red tinsel hearts on it and froo-froo it up, but my husband didn't really like that idea. Truth. He had an opinion about the Valentine's wreath.
So, I had this grapevine heart wreath for ever and I just decided to pull off the out of date stuff that was on it and use it for my wreath. Kinda perfect, right?

I started to just pull the old dried flowers off, the hot glue was so old it just popped off without damaging anything. I know it might seem pack-ratty to keep everything, but I have craft closets, and I don't really have that much. Just stuff that will save me a ton of money if I don't have to re-buy it. Do you know how much grapevine wreaths can be? I have a bundle of them that I got at a yardsale for next to nothing, HUGE ones, and all I had to do was take the old decorations off.

 
Ok, back to the dissasembly...and enter my "helper". She is just about the most curious cat there is. Loves the sound of tape being torn from anything and will climb a mountain to get it. Completely disarms you of your needle and thread if you are trying to so much as sew a button (like tonight) to eat your thread, and of course, she must try the grapevine stems of your wreath if you happen to be working on the floor. Not that a table would stop her.


Oh, yeah...she rolled all in the discarded dried stuff, too. And tried to eat it. And attack it. She's pretty spunky for a 13 year old.


I'm sorry I don't have any assembly pictures, but I can walk you through it. It's pretty self explanatory. I definitely wanted to use the flowers I made, and wanted to incorporate the word love somehow. I found a box of red glittery chipboard letters that I had. They were the perfect size. I would have loved to use that new burlap garland I just bought , but I couldn't figure out how to incorporate it. Plus, I wanted this to be light and airy. I had a bunch of tulle I bough on sale just before Christmas so I cut a long strip of that and weaved it through the wreath. It seemed made for something to be weaved right through there, so that worked out, too.


Then I tried my letters out until I found the right spot for them and hot glued those down.


Next, I started laying the flowers around until they looked right. I had more white ones than anything else and one teeny tiny flower, so I placed them by the "L" to use all the flowers and ballance the look. When I decided on the placement, I just hot glued all of those down, as well.


I really like it! It's not what I was thinking of at first, but I don't think I really knew what I was thinking of. It matches my pillows and I finally used a wreath I've had for years that I didn't know what to do with. The best part about all of these projects...it was all free!!


I truly hope you have a wonderful Valentine's Day. If you're a couple, do something nice together. It doesn't have to cost a thing! Make dinner together from a new recipe topped off with a special dessert you both made, and watch a romantic movie at home. One of our favorites is "The Notebook".  If you are parents, take your kids to the movie or have a movie night at home. Look online for Valentine themed party ideas and play some games and make treats with your kids. If you're single, get together with some of your single friends and go to dinner, or a winery, or have a dinner party at home. Watch a goofy, funny, sappy romantic movie like "Date Night" and laugh together. Or treat yourself to an evening of shopping or a trip to the salon. A quiet night at home curled up with a book with the ringer and television off or a glass of wine and an old black and white like "Casablanca" is a great way to treat yourself. No matter what you decide to do, treat yourself, and others well, and spread some Love!


                   Have a great week! Have a great Valentine's Day! Eat some chocolate!!

With Love,

Nanette

“How do I love thee? Let me count the ways.
I love thee to the depth and breadth and height
My soul can reach”
Elizabeth Barrett Browning
Saturday, January 26, 2013

Winter shots and January outdoor pillow covers

Well, hello, there!

How have you been? Surviving these cold winter months (if you live in that climate, that is)? How about the start of a new year?

Well, I guess it's sort of the end of the start of the new year, huh? I, like many of you, have been busy, as always, but I've still been working on some projects. I can't wait to get started on the really BIG ones, though. I've got some fabulous chairs to refinish, some tables, a bench...a lot on our plates, all while Noah is still remodeling and refurbishing things in the house, like the 116 year old staircase we are re-doing (we wouldn't be if it hadn't already been done with boards, not stair treads, in the 80's). So there is a lot of measuring and cutting going on behind me right now, as a matter of fact...

Anyway, I finally got my winter outdoor pillow covers done, almost just in time to change them for Valentines day, but I finished them Monday. Of course, like all my others, they are playing double-duty. I'm showing you the January/winter side now, and will reveal a surprise in February.

I am hopefully also finishing up some stenciled throw pillows for my couch later today, and I will share those with you soon, as well.

So, I pretty much made these the same way I made all of the others in my Fresh outdoor Autumn porch decor post. I just lay my pillows onto the fabric I want to use and trace with a disappearing ink pen. Before I sew them together I figure out what I want to decorate the front with and assemble all of that on and sew that to the face of the pillow, then I sew them up leaving a very sturdy hemmed opening at the bottom to remove the pillow for storage. I like to use twine for the closures and just hand sew knotted pieces of that evenly spaced to tie shut.
*(View the photos in a separate gallery by clicking on them for better views and to page through like a slide show.)


First I wanted to share with you a few shots I got after the rain froze on our greenery...so pretty...


Now for the pillows...

I wanted to do a white on white neutral pillow using a natural winter theme. I took some of my greenery from the baskets outside (I've left all of the greenery minus the Christmas decor for January in the hanging baskets outside). None of it dried out as of yet due to the rain and soil that's in them, so I had nice flexible branches. I had never done this before so I practiced a little. I definitely wanted the stem of the branch to be in the image and wanted it in white so I poured out some white acrylic craft pain and sponged it on. The first try dried too quickly, as acrylic paint tends to do, so I didn't have the greatest transfer of my image. I mixed in a little water and worked quickly and I think it turned out pretty good. It's a little heavy on the paint in spots, but I decided I kind of liked that. It has a very organic handmade look. Just what I was trying to achieve, really.


I wanted a little more than just plain raw-edged Osnaburg as my decoration, so I decided to pull out some white satin ribbon and detail the edges. I glued the ribbon on, tucking the ends for a tailored look, using Liquid Stitch (it really works!) and let that dry. When that was dry, I decided I wanted a little more of a natural earthy feel to off-set the delicacy of the ribbon, so I pulled out the twine that I was planning on using as the tie closures and measures four pieces long enough to tie together into knots at all four corners. I glued the knots down a bit and let them dry for a few, then sewed each one on with a zig-zag setting on the machine using a neutral colored thread. (I know, I know...a bit more trouble than I thought, especially for an outdoor pillow, but I had a vision, ok? :)


As for the vintage toolbox and lantern...I just left the greenery and pine cones in and left it natural, neutral and wintry.


I just thought it was important this year to keep something fresh and colorful (or natural) on our porch even in these winter months. It gets dark so quickly, and is so cold some days you don't even want to go outside. So, when we do have to go out, and while we are longing for warmer days, it's nice to come home to a welcoming porch, I think!

How have you been beating the 'winter blues'?  Any projects in mind? Anyone out there lucky enough to be taking a vacation somewhere sunny and warm?

Well, that's it for now, but I've got some Valentines projects under way and I can't wait to share them with you! Do you have any special plans in mind for the Most Romantic Day of the Year?

As always, thanks for stopping by and have a great weekend...(and don't forget to stop by my sister blog confessionsofathinkaholic-ns.blogspot, I've just posted some new stories to warm you up)!

Nanette


Wednesday, November 21, 2012

Happy Thanksgiving!

Happy Thanksgiving, everybody! I hope you are well and cozy, preparing for tomorrow. I'm getting ready to make some homemade clementine and cranberry sauce and a pecan pie (the only two things I can make ahead of time.) I am so thankful to be off work tonight and to get to spend the holiday with my family all day tomorrow...until I have to go to work at ten, anyway.

So...I just wanted to share a bit of our Thanksgiving decor with you. Hopefully you have some downtime tonight to browse through my blog and see what I've done.

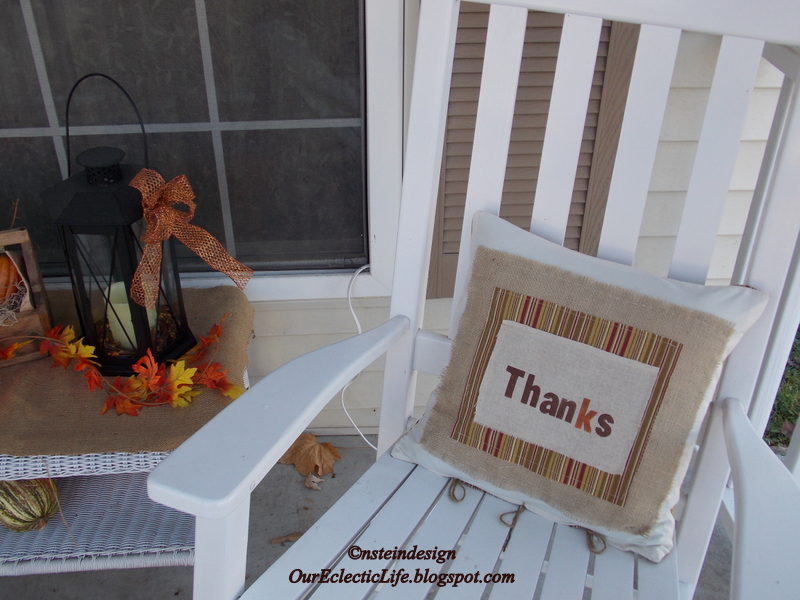
Remember these pillows from my Halloween Decor post? All I did was sew some Osnaburg fabric to the striped fabric and then sewed that to the burlap. I used the same stamping technique on the top layer. I just flipped my pillow cover around and sewed it all to the back. Easy peasy!


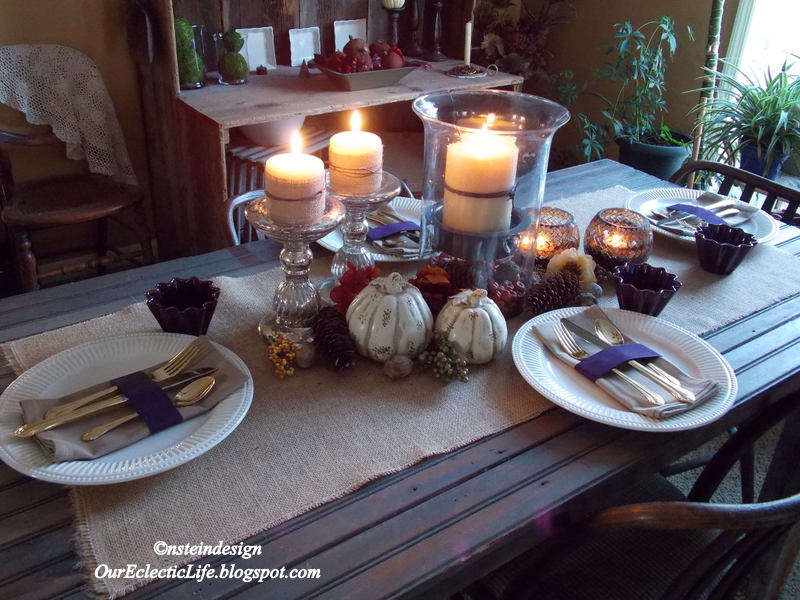
I've kept the table centerpiece the same as in my Fall Table Decor post. I added the white plates and gold cutlery to the fall napkins for tomorrows feast.


I had these napkins (already folded :) and just added a bit of purple ribbon I had on hand and secured the ends in back with, of all things, a glue dot! It's serving it's purpose well. I just slipped my mom's gold plated cuttlery under the ribbon. Nice and simple. I love how it turned out!


Here is the console table. I didn't know quite what to do here. I didn't want to go overboard, but would have liked to have a nice full display like some I've pinned on Pinterest, but this suits me just fine for this year.


Here are the hobnail jars I pinned on Pinterest and bought immediately. They were so cheap! I got them from Save-On-Crafts. I love them. I filled them with corn kernels and set tricolored pillars on top. Super easy and super cheap!


Just a Better Homes and Gardens centerpiece candleabra.


Here is my barnwood hutch. I kept some the same, but changed it up for Thanksgiving and the Harvest.


I replaced the candy corn for real corn kernels in these candle holders. I had these hurricanes and I wanted something bright green in them. I was going to use real Hedgeapples, but they were going bad. I found these moss balls at Hobby Lobby. They weren't cheap, but I had a coupon. I will use them all year 'round.


I wanted gold letters from Hobby Lobby, but they didn't have what I wanted. They didn't have all the letters in the same finish, so I bought these unfinished letters from Michael's instead. Noah sprayed them for me. I had to think about them for a bit, you can see they weren't finished in some of the other photos. I came up with this, and I love it. I just took more of the purple ribbon, a little burlap, some berry picks, and tied it all with twine. Another easy, cheap project.


 A few more mini moss balls. I just put them in a bowl with some Spanish moss and leaves, and lit some candles in Thanksgiving votive holders.


I used my treenware scoop to hold some more corn and a little grubby candle to finish off the space.


 All in all, I like how it turned out. It was pretty quick, which is good, since I was so short on time. But I got the effect I was looking for. I just want a festive, cozy Thanksgiving with my family. We'll be missing our moms this year, but I take comfort that we have a place to be together to think about them, talk about them, and discuss our many blessings and hopes for blessings for others.


I hope you have a wonderful, grateful, Thanksgiving, wherever you are. If you didn't get a chance yet, I wrote a post for my other blog, confessions of a thinkaholic. It's all about graditude and how to be more thankful in your life.

Thanks for taking time out of your busy schedule to share with me today!

Nanette

Saturday, October 20, 2012

Halloween pillow cover, a look at our town

Happy weekend, everyone! I hope you've all had a chance to get out and enjoy the Autumn splendor...
I finally got that pillow cover done out of that vintage-look Halloween fabric.

Here's a close-up


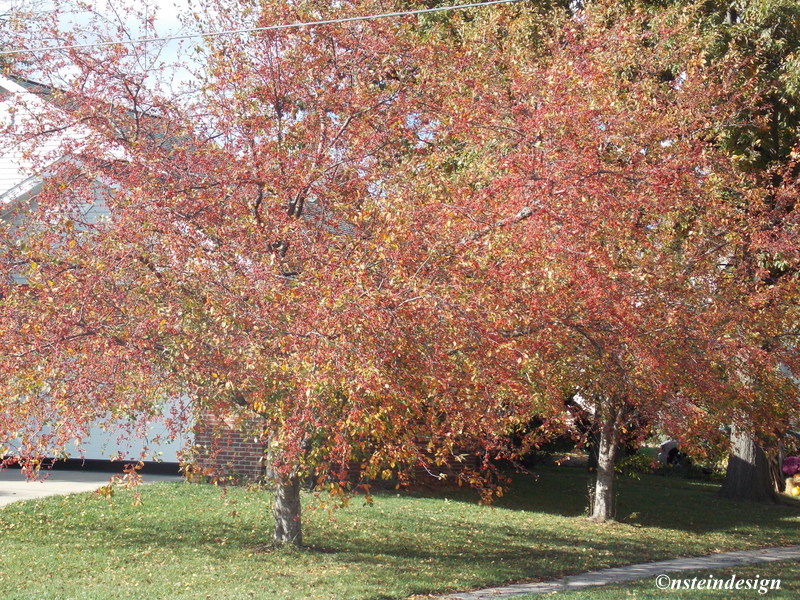
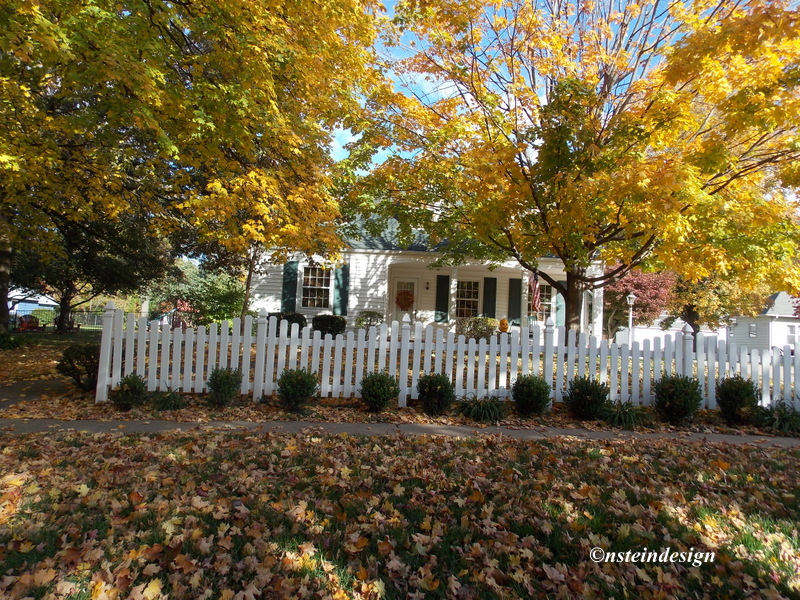
I also took a drive around town and through our neighborhood. I wanted to get some pictures of the color before we left for Tennessee. Here's a look down one of our streets.


I love the view of the courthouse peeking up above the trees...


Here's a view from our own street...


Trees on the corner of a house we walk past on our walks.

 The view down the street I come down every day on my way home from work. At the end, take a right, that's our street...

Here's a cute house we walk past...


Our town is full of color.

 Some more houses on our route....


 Our courthouse in the middle of town.

A great house across from the courthouse, and the Library behind...


                                                                     Our Library

 More houses on this side of town where we like to walk


                                        Everyone's starting to get into the Halloween Spirit!

Tomorrow we're going to get some pictures along the Great River Road and surrounding streets and historic areas, so stay tuned.
Just when you may be thinking your getting tired of where you live, look a little closer at the everyday things you may be taking for granted. You just might find some wonderful things that have been there all along!

Have a great weekend!

N